We had our first official day of school yesterday, and I'm so happy to slip back into our homeschooling routine again. No babies in this house any more -- everyone's in elementary school now, with my oldest entering fifth grade this year. There was a time when I missed my life in an actual classroom, feeling a bit lost and left behind here at home. Not any more. I think I feel more content with life than I ever have before. These days spent working, teaching, sewing, designing, helping, sharing -- they are so full, so good.
The beginning of a new school year has always been one of my favorite things, and what better way to celebrate than with a free tutorial? I've been promising a pattern for this combination backpack/tote bag for a while, and who better to model the Cubby Pack for you but my own little Bear. She was so excited to wear it for the first time today!
This pattern is meant for a child, but you could easily make it work for an adult by just making the straps longer. It's actually a surprisingly simple project to sew. The most complicated part is probably threading the backpack straps, and rather than reinvent the wheel, I just send you over to a
brilliant tutorial by the clever folks at Colette Patterns who have explained things far more clearly than I ever could.
I'm giving you just the basic backpack pattern here, but this is so easy to customize. Add an inner pocket or zipper pouch for smaller items. Ditch the patchwork and use just one fabric for the exterior to make it a quicker finish. Add one or two more leather closures to the top to keep things buttoned up even more firmly. For me, a tutorial is a launching pad for even more great ideas. I love to see how people play with my patterns to make just what they need!
Wouldn't this be a fun project to sew for (or even
with!) your favorite student? If you make one, be sure to share a picture with all of us on Instagram -- tag it #cubbypack and tag me too @fabricmutt!
Okay, here we go!
Materials and Measurements
Finished size: 9 1/2" wide x 10" tall x 3 1/2" deep
Fabric:
|
For:
|
Cutting:
|
21 cotton print scraps or 1 mini charm pack
|
Front exterior panel patchwork
|
21 squares 2 1/2 x 2 1/2”
|
1/2 yard linen
|
Front ext. panel
Back ext. panel
|
1 rectangle 7 x 14 1/2"
1 rectangle 13 x 14 1/2”
|
1/2 yard batting
|
Exterior interfacing
|
2 rectangles 13 x 14 1/2”
|
1/2 yard white apple print
|
Lining
|
2 rectangles 13 x 14 1/2”
|
1/4 yard red floral print
|
Tote handles
|
1 rectangle 3 x 16”
|
1/4 yard Pellon Craft Fuse fusible interfacing
|
Tote handles interfacing
|
1 rectangle 3 x 16”
|
1 1/2 yards 1 1/2” wide cotton webbing
|
Main straps
Buckle straps
|
2 pieces 24” long
2 pieces 3” long
|
Leather scrap
|
Bag closure
|
1 strip 1 x 2 3/4”
|
Findings: 4 metal slides (1 1/2” wide), 1 metal snap, adhesive basting spray, chopstick or turning tool, binding clips, ruler, rotary cutter
|
Sewing Notes
All seams are 1/4" unless otherwise stated.
Press seams toward the darker fabric or open if you prefer.
RST = right sides together
WST = wrong sides together
Tutorial Instructions
1. Sew the 21 patchwork squares together in 3 rows of 7 as shown in the photo above. Sew the 7 x 14 1/2" linen piece to the lower long edge of the patchwork piece to form the exterior front.
2. Use the adhesive basting spray to fuse the wrong side of the exterior front and back panels to the 13 x 14 1/2" batting pieces. Topstitch 1/8" below the seam between the patchwork and linen on the exterior panel. Quilt as desired.
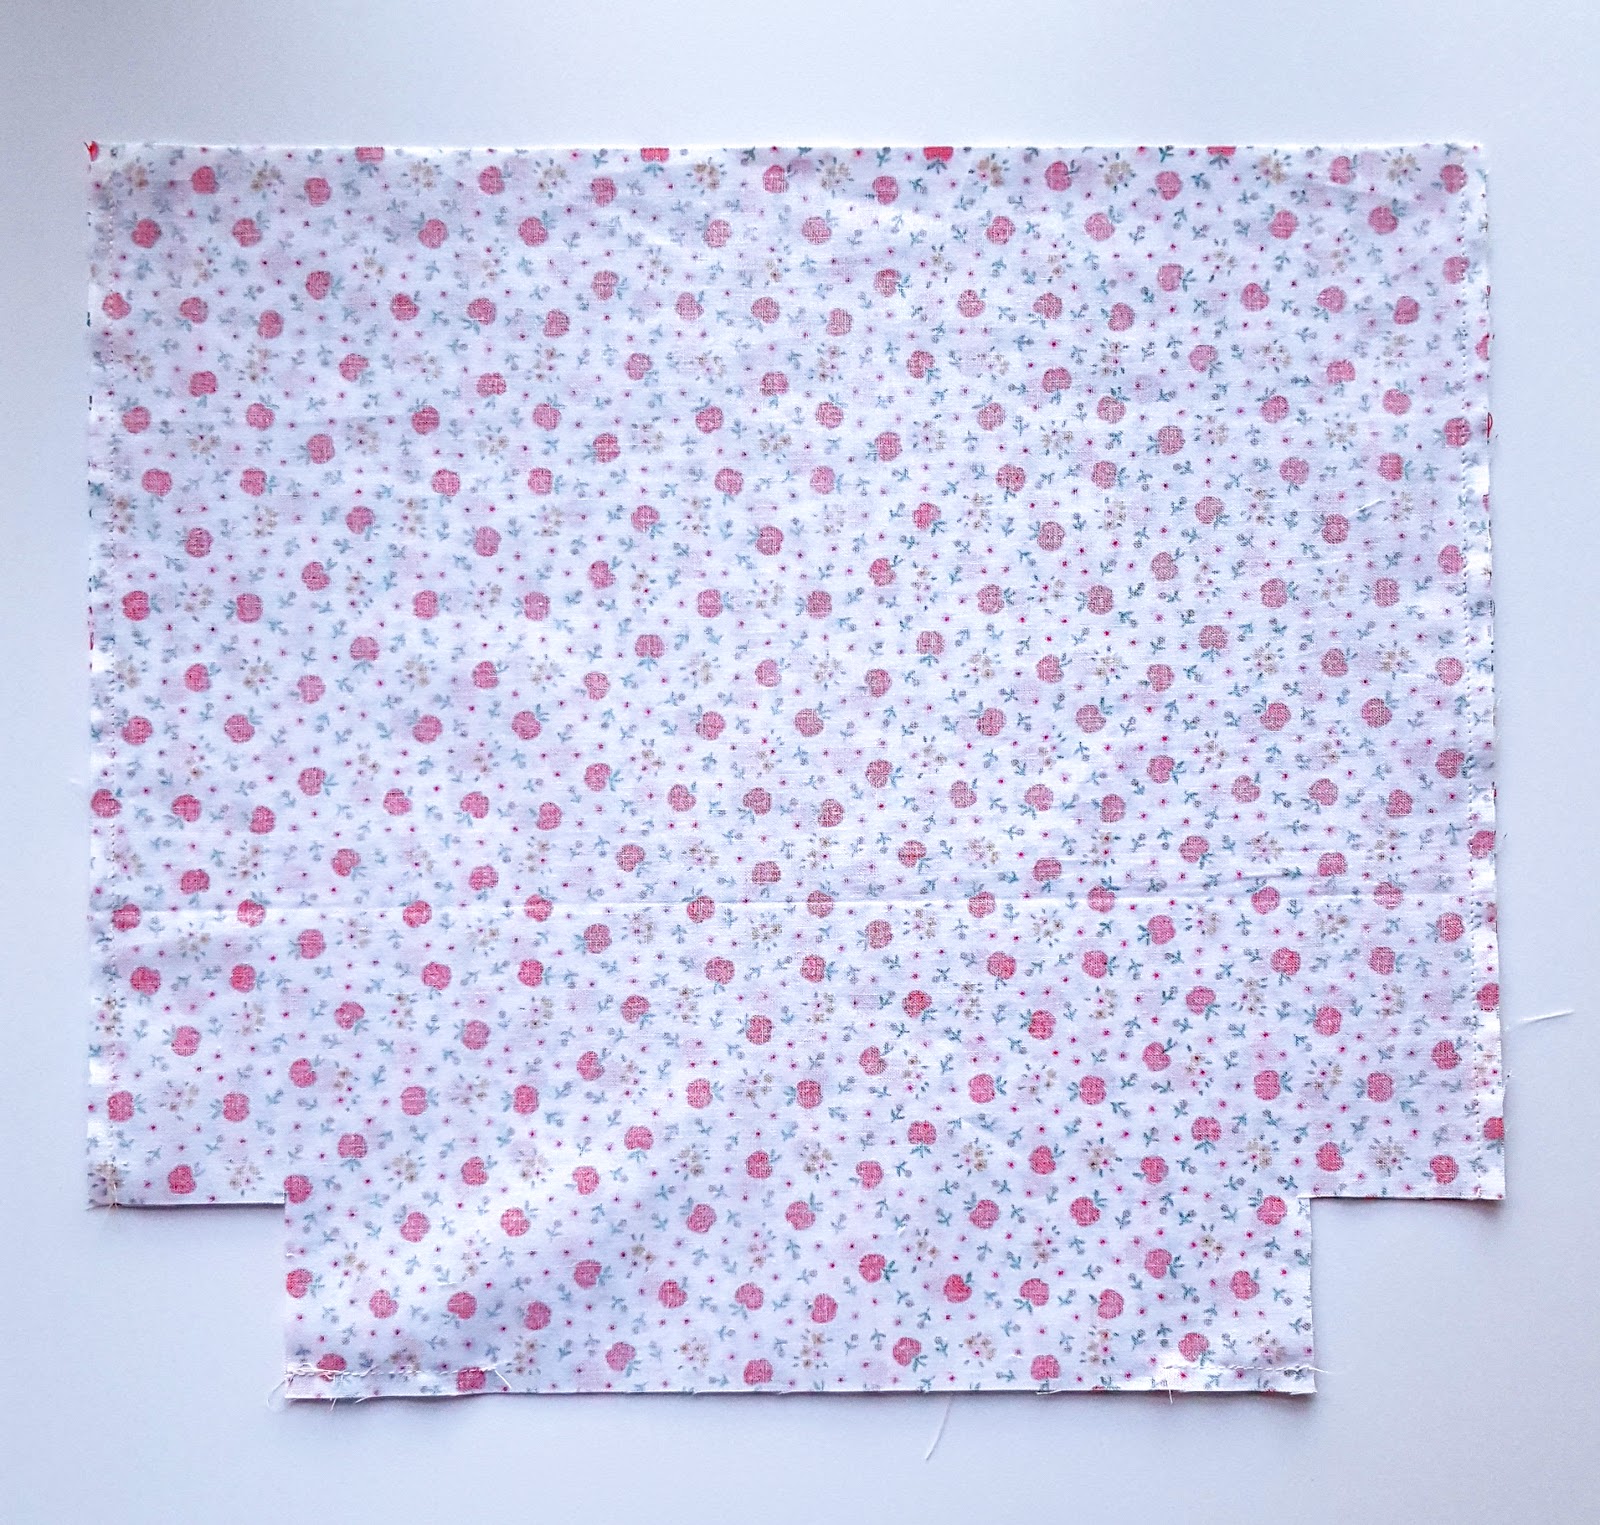
3. Place the two lining panels RST and trim a 2 1/2" square from both of the lower 14 1/2" edge corners. Sew the two panels together along the sides and lower edge, but do not stitch along the open corners. Also be sure to leave an opening of 6-7" along the lower edge for turning later on. Cut 2 1/2" squares out of the lower edge corners of the exterior panels also, but do not sew them together just yet.
4. Box the corners of the lining. Push down on a side seam so that it lies directly on top of the seam that holds the lower edges together, creating a triangle of batting on that side. Use your ruler to measure off a 4" line down the side of that triangle facing the lining (the side seam should be resting at the 2" line). Use a pencil or fabric marker to trace that 3" line and then use your ruler to measure and cut a 1/4" seam just beyond that (which will measure 3 1/2" long). Check that your seams match up before stitching down the pencil line. Repeat on the other side of the lining.

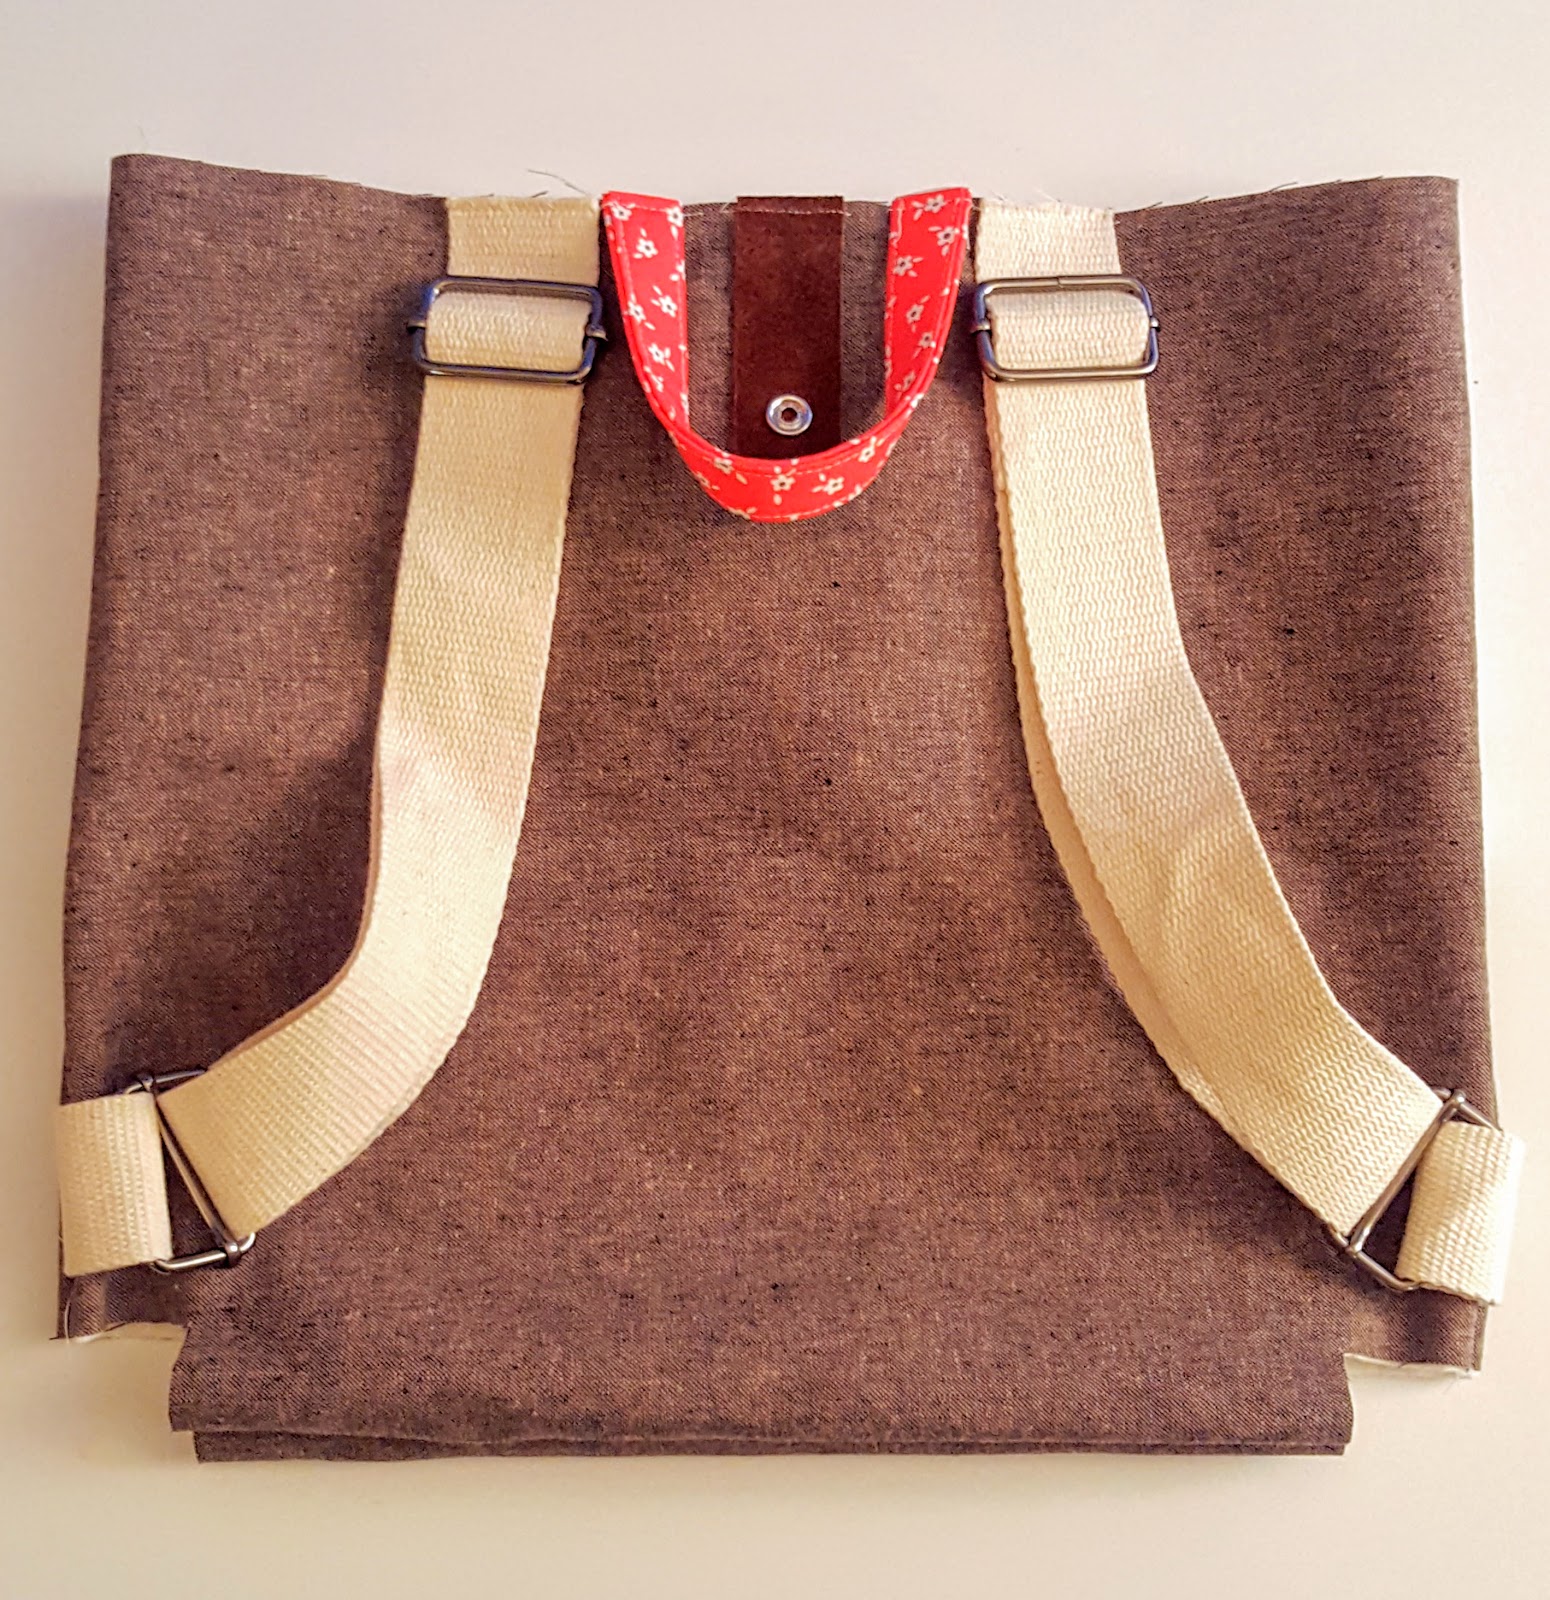
5. Make the tote handles just as you would make double fold bias tape. Fuse the wrong side of the handle piece to the Craft Fuse interfacing (following the manufacturers instructions). Fold the piece in half lengthwise, press, and then unfold. Now fold the long sides of the rectangle in toward the center fold and press again. Fold along that center fold again, sandwiching those raw edges in the middle, and stitch 1/8-1/16" from the edge along both long ends of the resulting 3/4" wide handle. Cut the piece in half so that you have two pieces, each 8" long.
6. On the exterior front panel, place the raw ends of one handle piece along the top edge of the panel so that the inside edge of each end lines up with the right and left sides of the center patchwork square (see above photo). Baste in place 1/8" from the top edge. Repeat with the back panel and other handle, using the placement on the front panel as a guide.
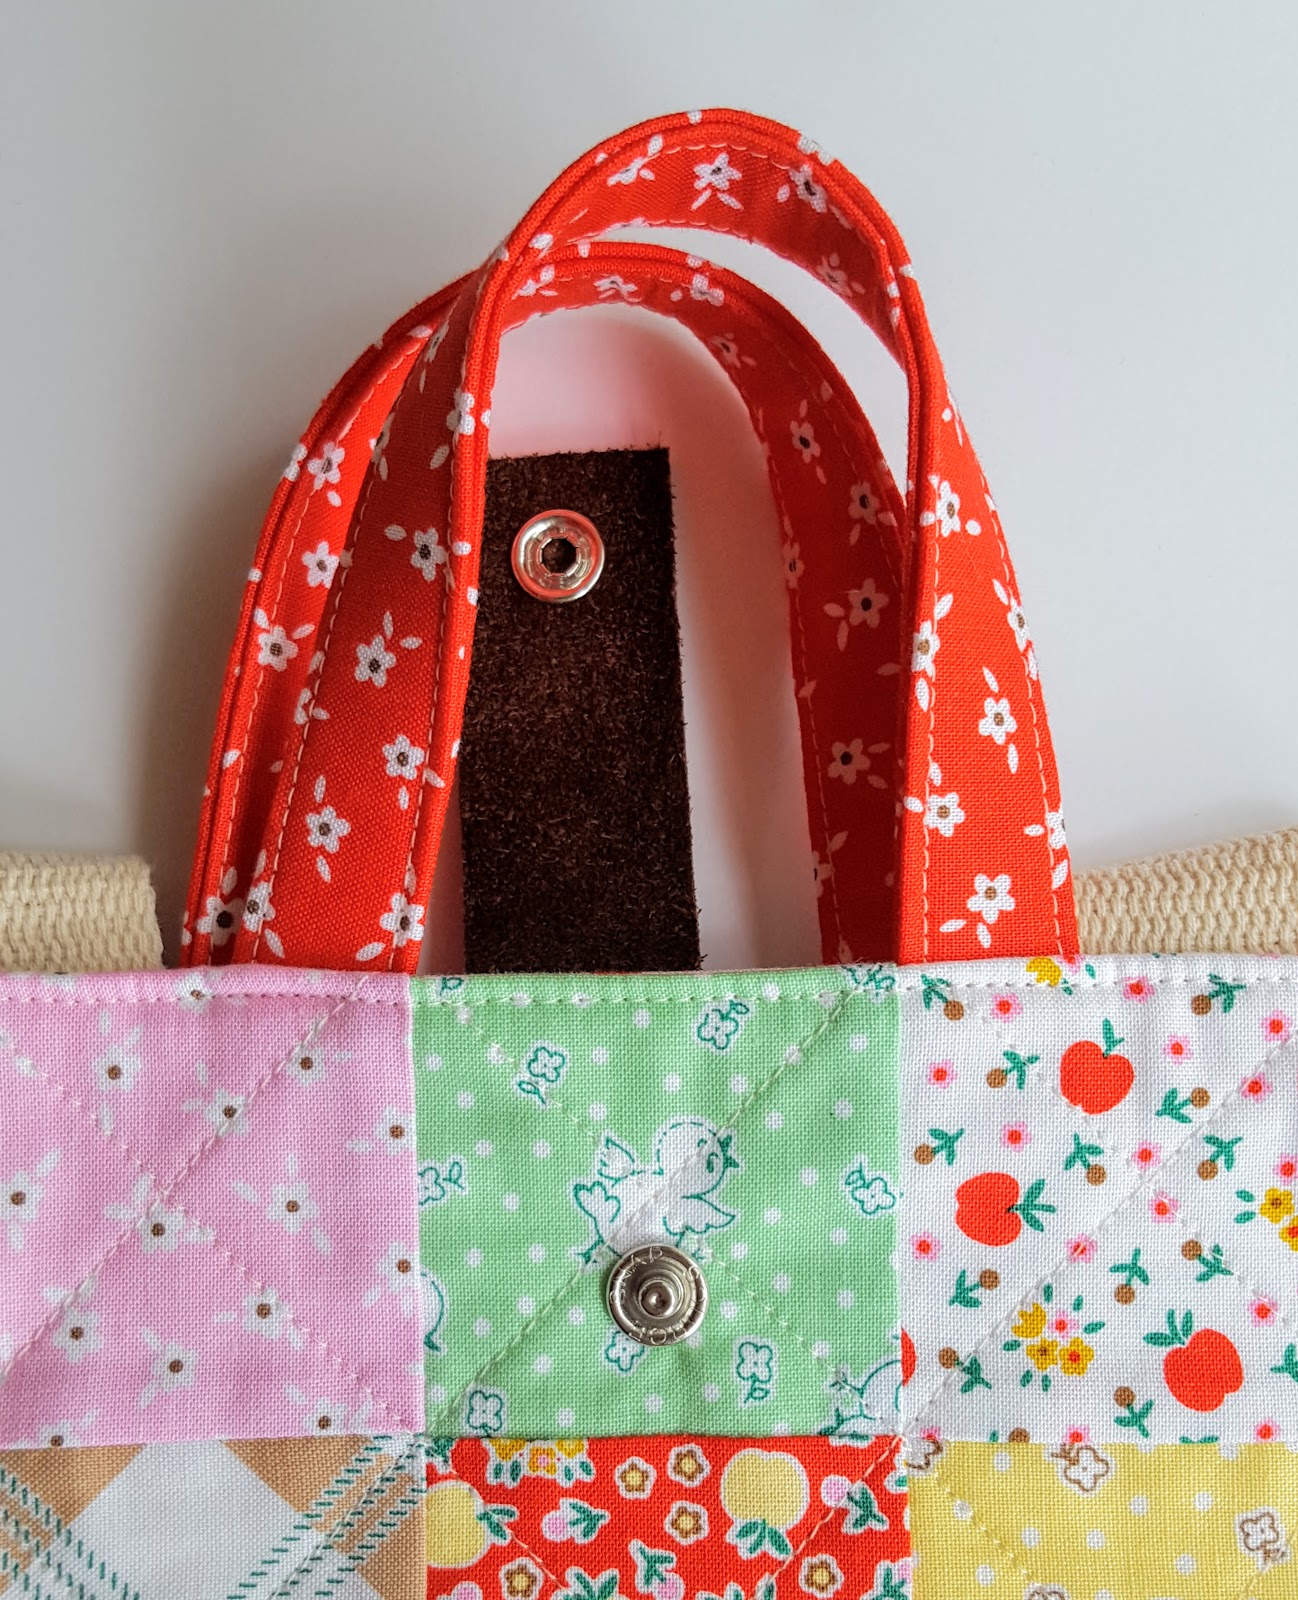
7. Attach one half of the metal snap to a short end of the leather strap according to the manufacturer's instructions, centering it about 1/2" from the short end. Center the other short end of the strap on the top edge of the back exterior panel, RST, and baste in place 1/8" from the top edge. Save the other half of the metal snap for later.
8. Make the backpack straps using the Colette tutorial found
here. (Even though this tutorial uses a longer length for the long strap, it will still work for this project.) Place the finished straps RST against the back exterior panel, tightening them up so that they are as short as possible while still lying flat against the panel and not wrinkling up the fabric (see photo above -- this will keep them out of the way while you sew). Baste the ends of the long straps in place on the top edge of the panel just to the right and left of the handles. Baste the ends of the short straps in place on the right and left sides of the panel, about 1/2" above the cut out square in each corner. (BTW the photo above is after I sewed together the panels in the next step but before I boxed the corners. I had forgotten to take a photo of the strap placement and wanted to make sure you could see it before I moved on!)

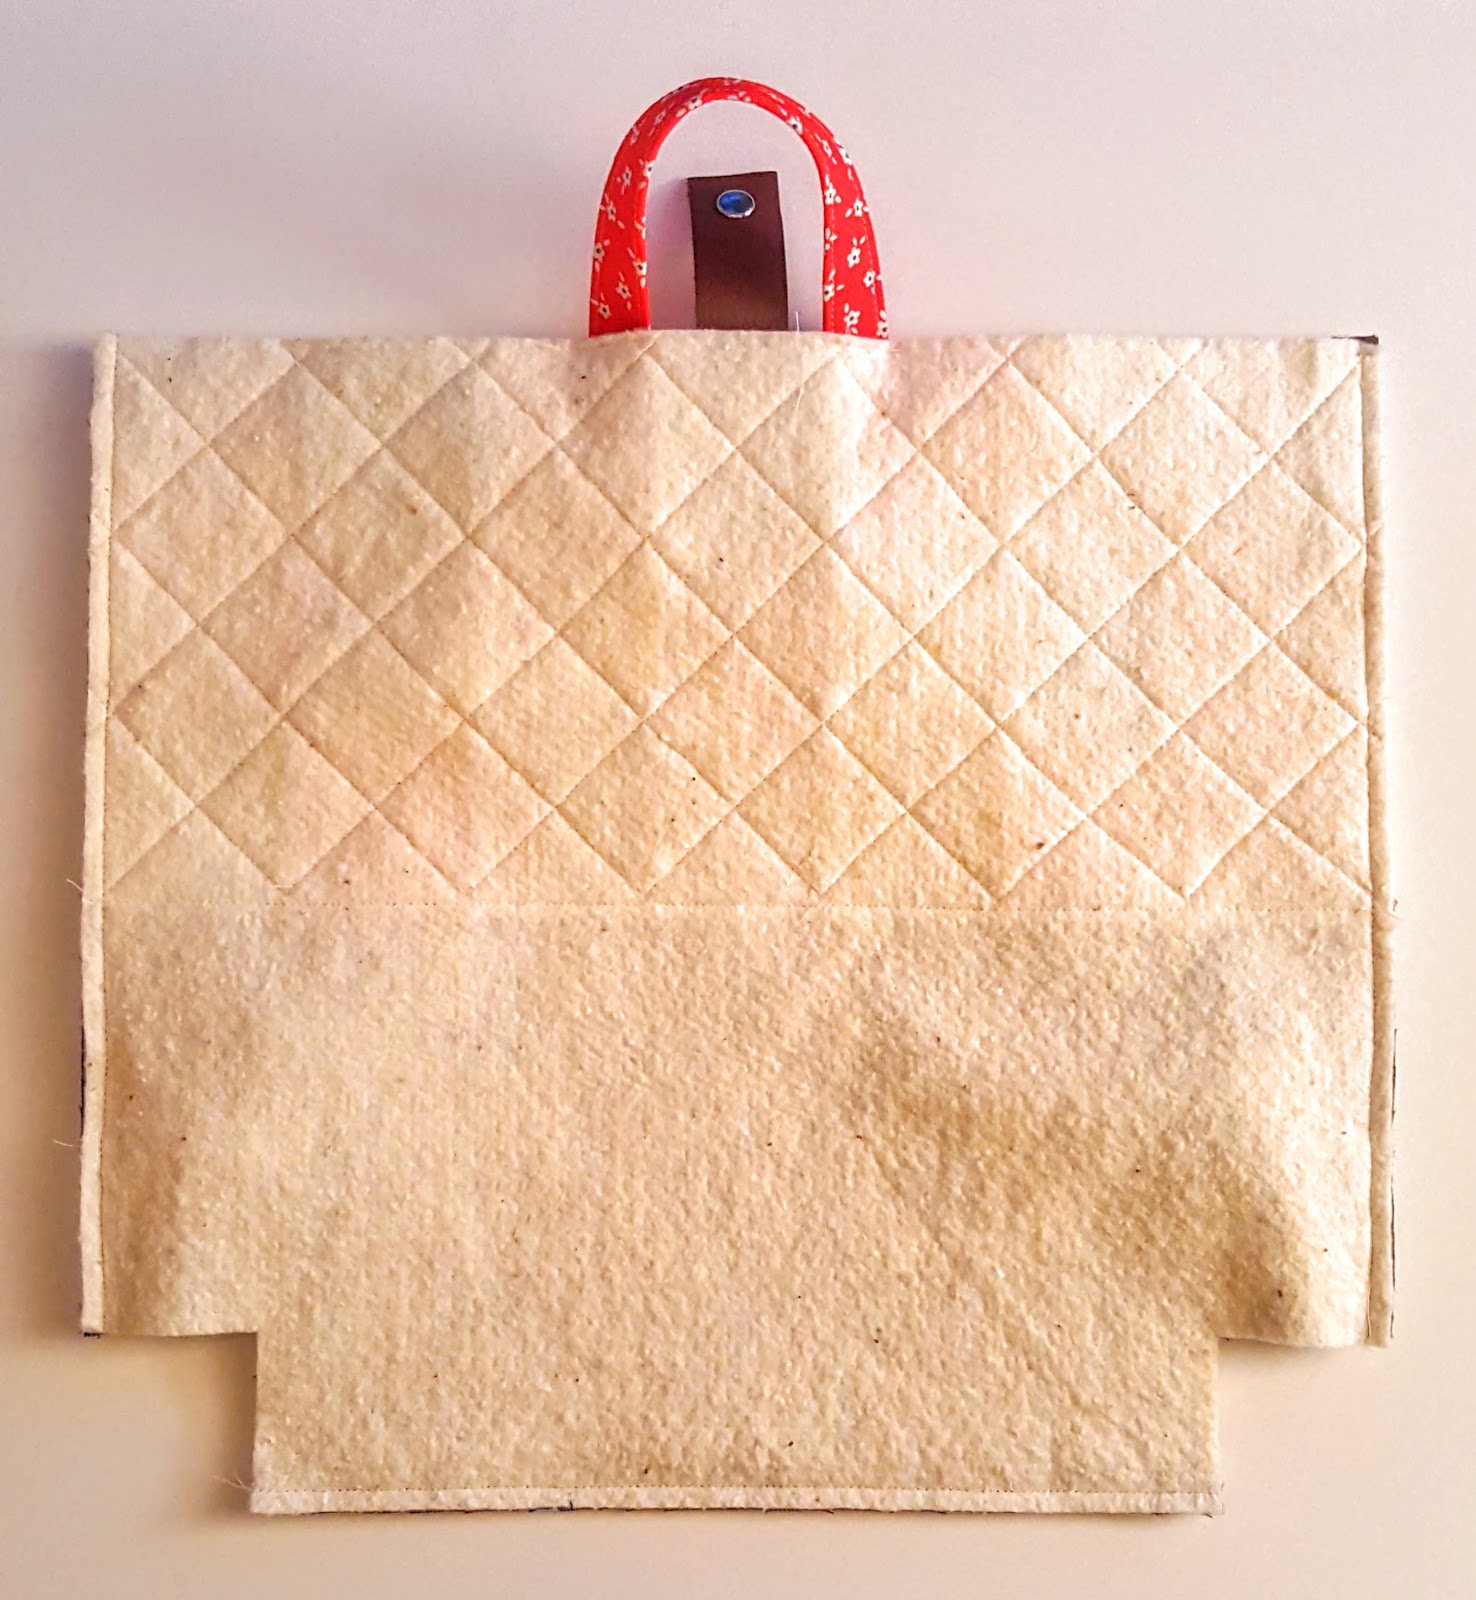
9. Sew the exterior panels together along the sides and lower edge, leaving the cut out squares open just as you did with the lining -- though without the opening in the lower edge for turning. Box the lower corners of the exterior as you did in step 4 above. Turn the exterior piece right side out.
10. Slip the exterior piece inside the lining piece with RST, matching up the side seams and holding them together around the top opening with binding clips. Sew all the way around the opening. Reach in through the gap in the lining and pull the exterior of the bag out through the lining, pushing out the corners gently with a chopstick and pressing them.
11. Tuck the raw edges inside the lining gap and stitch them closed 1/8-1/16" from the edge. Push the lining down into the bag and carefully press it one last time.
12. Center the other half of your metal snap about 1/2" from the lower edge of the top middle patchwork square on the exterior front panel and fasten it in place according to the manufacturer's instructions. Finish the bag by topstitching 1/8" from the upper edge all the way around the top opening. (I recommend that you start on the back behind the left strap so that you can make it all the way around without having to stop and move straps out of the way.) Fill up your Cubby Pack with school supplies and send your student off to class!
Happy sewing, my friends!